Note: These
instructions work with all controllers that contain
relays (such as the PicoBoo Jr and PicoBoo) . They do not work with the Flex, FlexMax, PicoBoo AC and other such controllers that do not use relays.

Here are the steps...
|
|
|
|
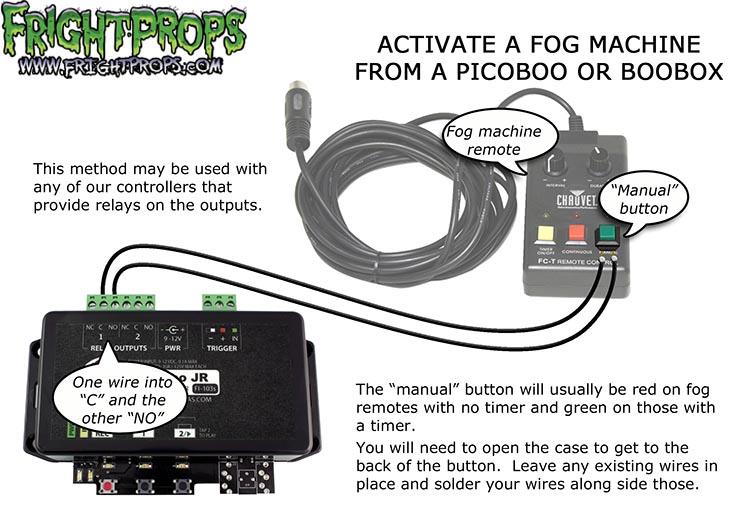
We will be modifying a fog remote to be activated by a controller. Shown here is a TIMER REMOTE. You can also use a MANUAL REMOTE. |
Open the case |

On the back of the circuit board opposite the buttons there will be two drops of solder for each button. We want the two that are for the GREEN BUTTON.
Your fog remote may be different, simply find the button that activates fog when pushed and wire into that (see next).
|
|
|
|
Get a few feet of wire (here we are using “lamp cable”, the stuff you find on lamps), strip the ends. |
Solder each wire to the drops of solder for the GREEN BUTTON |

Here you can see the wires soldered in place.
|
|
|
|
Screw the other ends of the wire into N.O. and C on the PicoBoo outputs (1 or 2) or the outputs specific to your controller. |
Here you can see the cable hooked-up to a PicoBoo. |
|
|
Program the controller to activate the output (see PicoBoo or BooBox manual).
When the output is activated the fog machine will output fog. |
|
Here is the completed project with the FOG REMOTE case closed and everything hooked up. |
Can't figure out which two wires to tap into?
If your manual remote looks different or you can't find where to hook into the button:
If you have a multimeter (or continuity tester) put it into continuity test mode. When the two leads are touched together it will beep.
Remove power from the fog machine and touch one lead to one of the wires on the fog machine's manual push button and the other to another wire. Push the button in. If you hear a beep then you have found the two wires you need to tap into. If you do not hear a beep then move the leads to different set of wires and try again. Once you have the two wires identified solder to them and install one into "C" and the other into "N/O" on the PicoBoo controller. Program the PicoBoo to activate the fog machine.
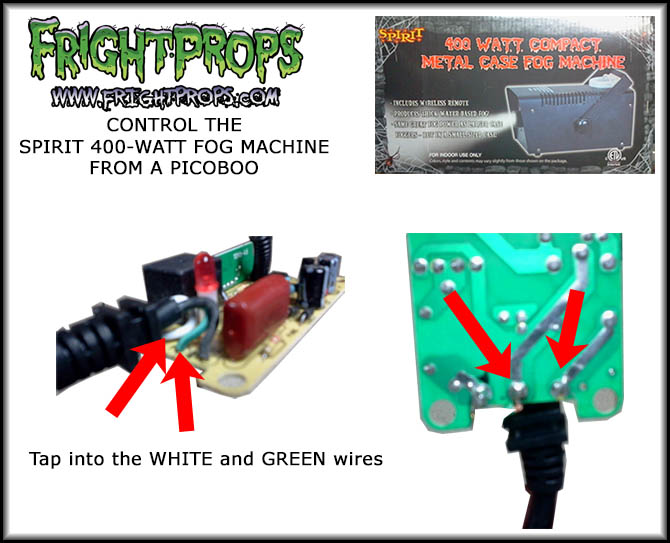
Specific Fog Machine Wiring


