How to make an Electric Shocker Panel
Please note: This project was submitted by FrightProps customer David Dankanyin at Pandemic Haunt Production . It has not been verified by FrightProps and we cannot provide support on this project.
This is a fun Halloween prop anyone can build and is guaranteed to get a huge reaction from your guests. The shocker panel is very loud and very startling and even though it doesn't move, people will run to get away from it. It can be used in many different types of haunts with all kinds of scenes, boiler rooms, a mad scientist scene with this sparking in the background, or even a power panel for your electric chair prop. I'm sure you can find the perfect place in your haunt for it. Below is how I made mine, with a list of what I used to make it and were I got the parts from. But please feel free to change what you want to work with what you may already have or what might work better for your haunt.
Things you will need to build an Electric Sparker Panel of your own:
(Prices will change so don't hold me to them.)
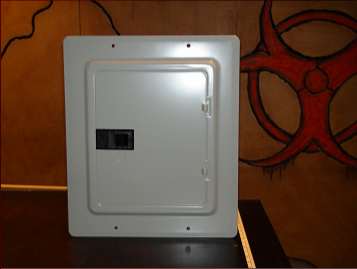
1) Power Panel (Murray 125amp Main Lug Panel) ($19.95 from The Home Depot)
2) Fright Props Flash Crackers ( 2 for $49.98 from FrightProps.com)
3) Fright Props Simple Prop Controller with 12volt power supply ($35.99 from FrightProps.com)
4) Flexible Metal Conduit (3/4 Dia x 25 ft roll) ($21.95 from The Home Depot)
5) Flex Line Squeeze Connector ($0.98 each from The Home Depot)
6) 1 1/4 Hose Clamps ($3.45 pk of 6 from The Home Depot)
7) Trigger ( Switch, Pressure mat, Motion Sensor......) Your choice
8) Wire, extension cord, Screws, Cable Zip Ties, electrical tape, Spray Paint ( If your a true Haunter then you should have these things laying around)
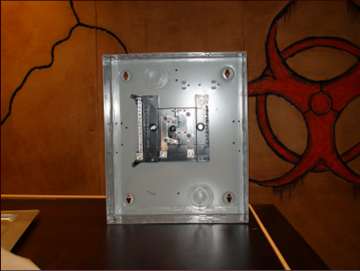
First you will need to take the front cover off of your power panel by removing the 4 screws on the front.
|
|
|
|
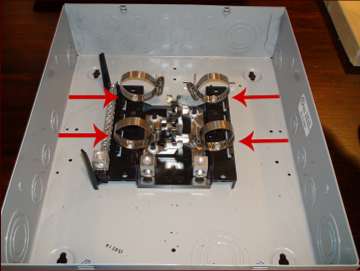
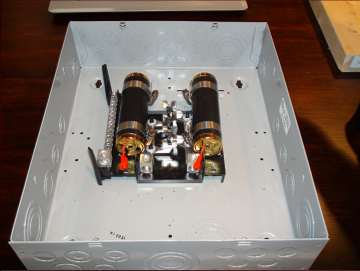
Take 4 hose clamps and mount them to the inside of the panel with sheet metal screws. These clamps are going to hold the Flash Crackers in place so make sure the clamps line up with the top and bottom of the crackers. It may be easier to drill a small hole into the clamps before trying to put a screw through them. Then just screw into the black plastic of the panel.
|
|
|
Open the hose clamps all the way and slide in the Flash Crackers, sparking side up and wires down. Tighten the hose clamps enough to hold the Flash Crackers in place but not to much that you crush them.
|
|
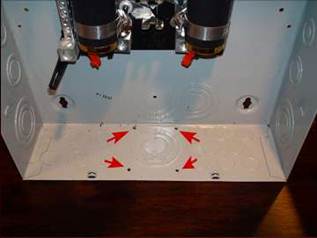
Drill 4 holes in the bottom of the panel to mount the Simple Prop Timer. You will need to put rubber spacers between the timer and the panel to keep any electrical from touching metal. Use 6-32 screws and nuts to hold in place.
|
|
|

|
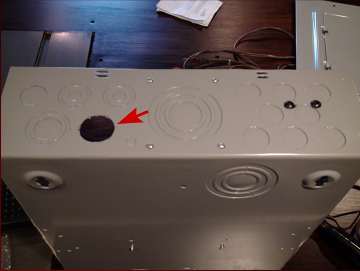
Knock out a "knock out" hole in the bottom of the power panel for the Flex Line. |
|
|
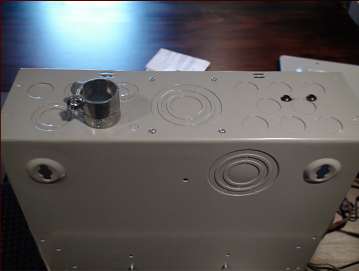
Install the Flex Line Squeeze Connector.
|
|
|
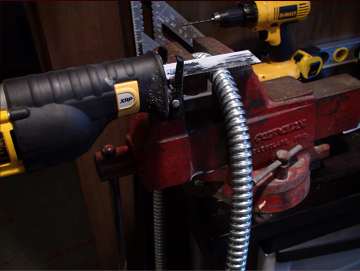
Cut the Flex Line to the proper length. ( cut it to the length of wire for the 12 volt power supply that came with the prop timer. About 6 ft.) |
|
|
Attach the Flex Line to the Squeeze Connector.
|
|
|
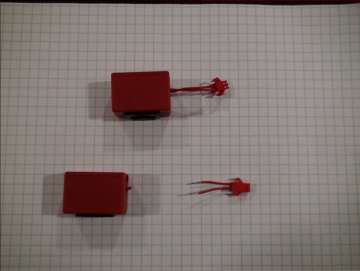
Now it's time to hook it all up. Take the red connector block that comes with the Flash Crackers and cut off the little 2 lead connector from the power cord connector. |
|
|
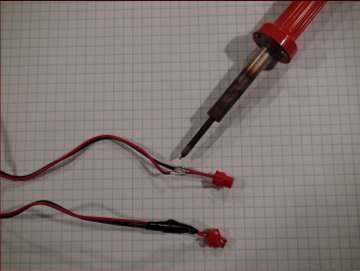
Solder 18 gage wire, about 12 inches long, to the ends of the two wires on the connector. Wrap with electrical tape or heat shrink.
|
|
|
Plug the connectors into the Flash Crackers.
|
|
|
|
Wire as shown in the picture. Don't forget to run the power wires through the Flex Line before hooking it all up. (Not saying I did that, oops, but it does suck unhooking everything and redoing it again.) The instructions that come with the prop timer will explain the wiring better. |
|
Here is what the inside looks like all done. (I left extra wire from the extension cord on the right just incase I want to add something later. Better to have too long then too short.) |
|
|
Now to finish the outside. You first have to cut the center out of the front cover. Here I used a milling machine but you can use a Jig Saw or the trusty Saws-All. Just cut around the inside so when the door is closed it covers the hole. |
|
|
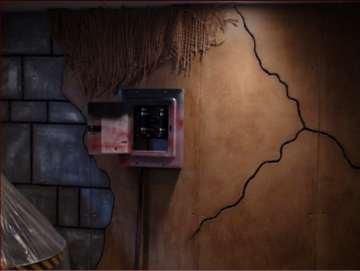
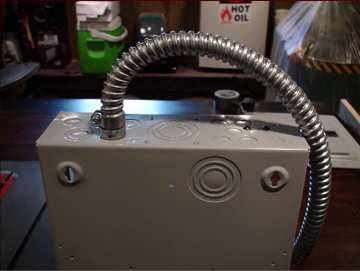
Re-attach the front cover and paint the whole thing to match your haunt thyme. I used Black, Red, and Grey spray paint to give a rusty burnt look. Then mount it to your wall with four screws thru the key holes in the back. Now get your scare on!!!
|
|